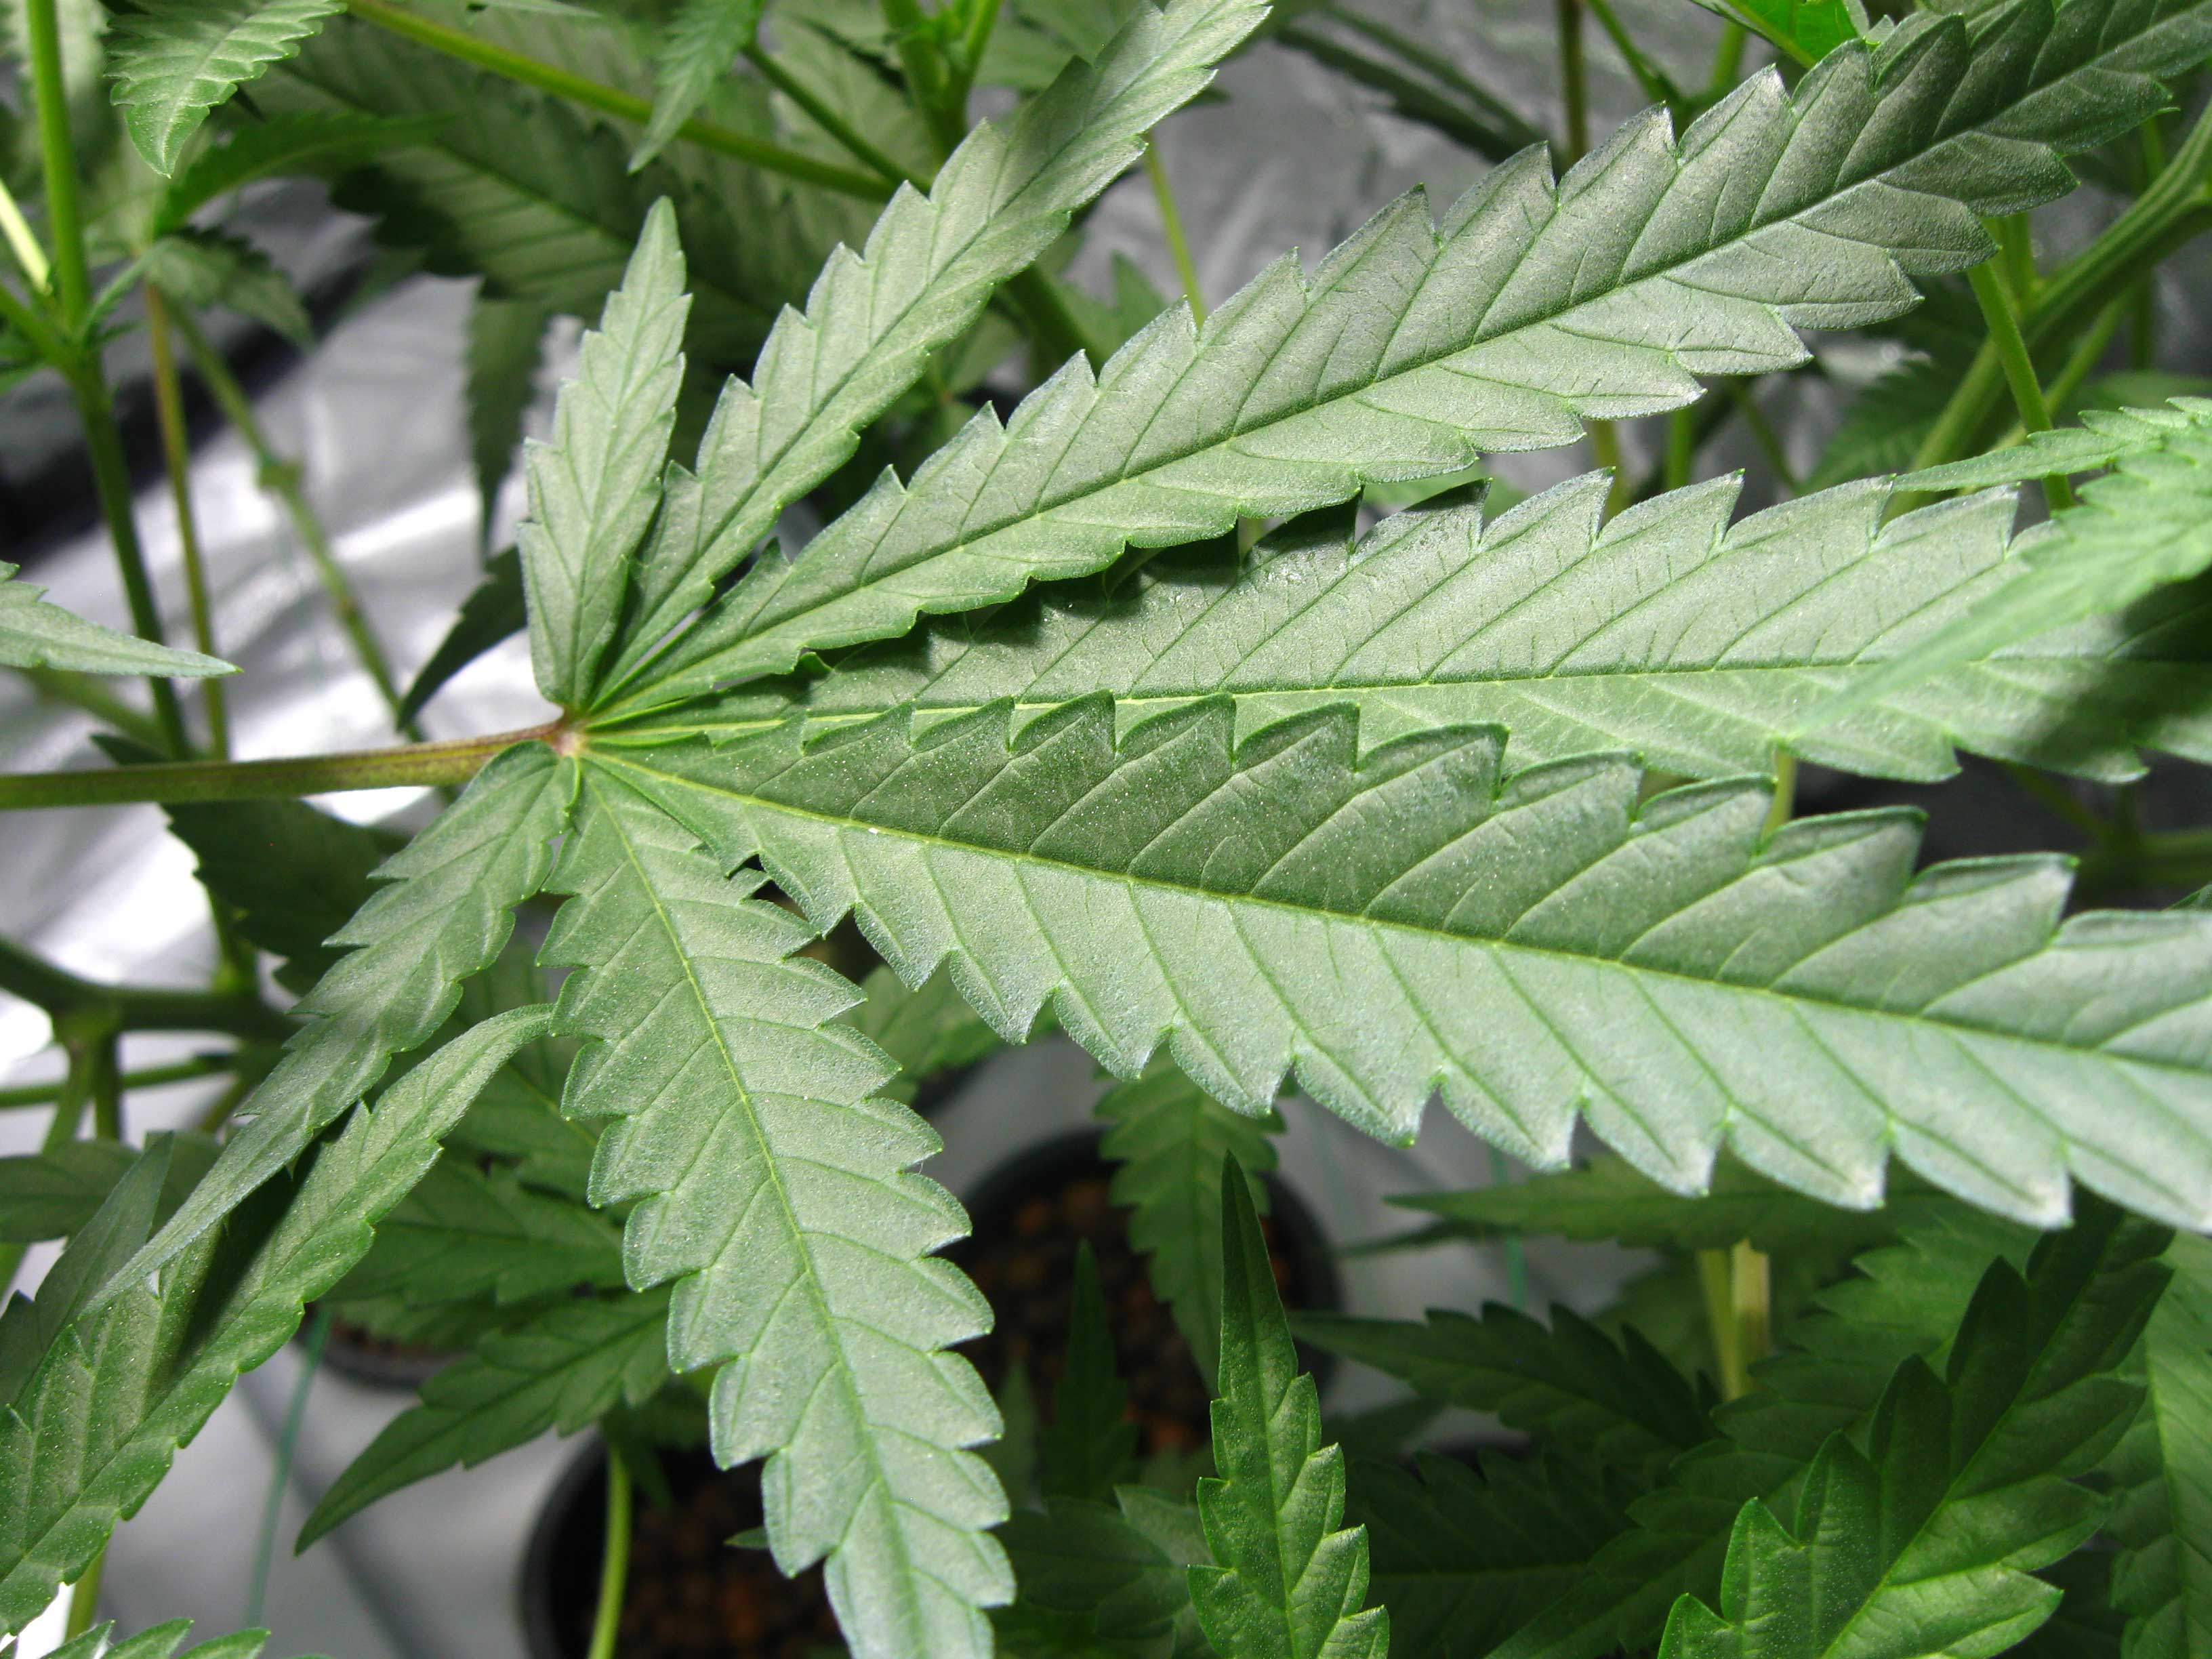
If you’re already using quality cannabis-friendly nutrients, the most common reason growers see nutrient deficiencies in their plants is that the pH at the roots is not right! See pictures of cannabis nutrient problems caused by incorrect pH.
Adjusting pH takes less than 5 minutes, and your plants will reward you. Think of it like a supplement to make your cannabis grow faster and healthier!
Table of Contents
Introduction: How Does pH Prevent Nutrient Deficiencies?
- Soil pH Chart (6.0 – 7.0 pH)
- Hydro/Soilless/Coco pH Chart (5.5 – 6.5 pH)
How to Test and Adjust pH – Step-by-Step Instructions & Video
Digital PH Pen vs Drops / Strips
Summary: 8 Things You Must Remember About pH
by Nebula Haze
Intro: How Does pH Stop Cannabis Nutrient Deficiencies?
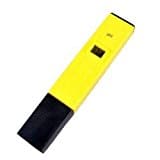
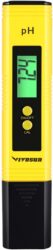
PH is the measure of how “acidic” or “alkaline” something is, on a 1-14 scale. A pH of “7” is considered neutral, for example, pure water has a pH of about 7. The measurements of pH have to do with the concentration of hydrogen in the sample. A cannabis grower can measure the pH of a water sample using special pH tester drops or a digital pH pen, like the one shown here on the right.
Okay, so why is pH important to cannabis growers?
Cannabis naturally likes a slightly acidic environment at the roots. Soil with a slightly acidic pH is what causes cannabis plants to thrive in the wild. Proper pH at the roots helps plants get access to the nutrients they need. If the pH at the roots is too high or low, the plant can’t properly absorb nutrients and you end up with cannabis nutrient deficiencies!
Paying Attention to pH Gives You Healthy Leaves!
Some growers get lucky and grow cannabis successfully without having to worry about pH. Perhaps they had just the right soil and happened to have just the right water to create the perfect pH environment for the plant roots. If your plant is growing perfectly, without any signs of nutrient deficiencies, then managing the pH might not be something you’re concerned about.
Unfortunately, many growers aren’t so lucky and their setup naturally has a pH that is too high or too low for optimum cannabis growth. While there are ways of getting around testing pH for your cannabis grow, nearly all growers will do better by paying attention to pH.
What Are the Benefits of Managing pH?
By maintaining pH…
- plants are less likely to suffer leaf problems or nutrient deficiencies
- without nutrient problems, cannabis plants can grow faster and produce bigger yields
- occasionally growers are alerted to possible issues before they become a problem, for example, if you determine the pH is too high or too low, you can fix it before your leaves start suffering from deficiencies
The main thing to remember is that maintaining the right pH at the cannabis roots helps the plant absorb nutrients. Why is that?
Nutrients take different forms (on a chemical level) depending on the pH around them. Some forms are easier for the roots to absorb than others. When the pH is too high or too low, the plant can show signs of a nutrient deficiency even when the nutrients are physically there at the roots.
With pH, you’re helping plants get access to all the nutrients all the time. While pH is important for all grows, it is most important for growers using cannabis nutrients. The way that liquid nutrients are formulated, they are highly available to plant roots, but only in the right pH range.
What’s the Right pH?
- Soil – 6.0-7.0 pH
- Hydro/Soilless/Coco – 5.5-6.5 pH
As a result of the pH being too high or too low, cannabis plants may start showing signs of nutrient deficiencies even if the nutrients are available in the growing medium.
Once you get the hang of maintaining the pH, it’s a breeze and will take you only seconds. And after you have your grow dialed in, you may not even need to check pH as often because you know what to expect.
What’s the Best pH for Growing Cannabis?
The following charts show you how easy it is for the plant to absorb each nutrient at different pH levels. This can give you something to aim for when you notice a specific nutrient deficiency.
In the wild, cannabis prefers a slightly acidic soil environment. For soil, an optimum root zone pH for cannabis is between 6.0 and 7.0, with the most time spent with a pH between 6.2 – 6.9. It’s a good idea to let the pH cover a range instead of always adjusting to the exact same pH number.
See which nutrients are best absorbed at which pH levels
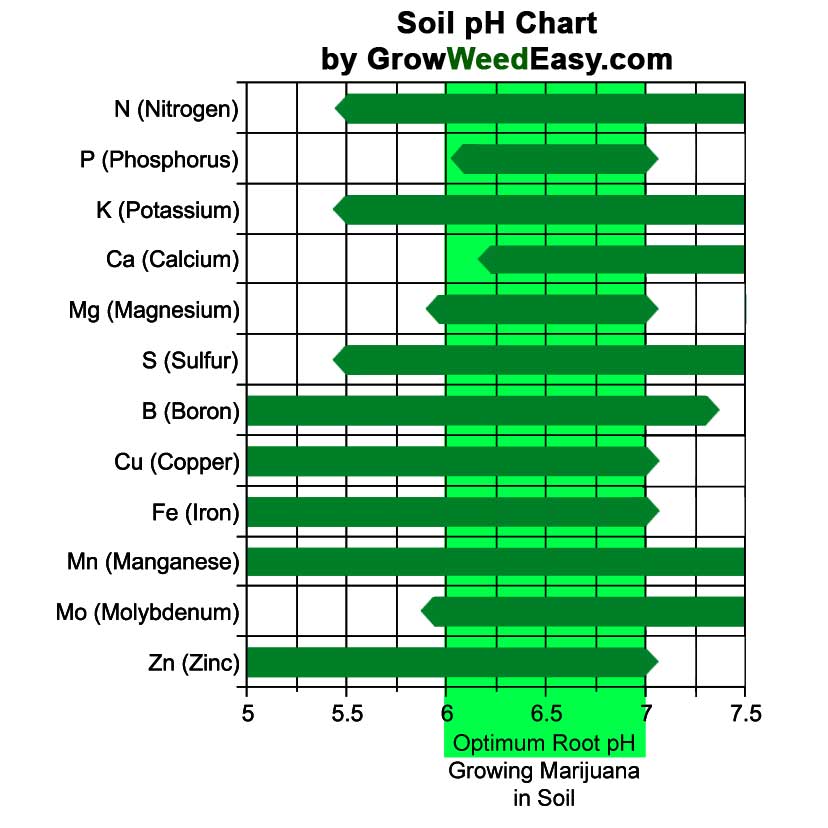
In a soil environment that doesn’t use liquid nutrients, pH isn’t as important. When using liquid nutrients in soil, you will almost always need to manage pH to prevent problems and get the best harvest.
Hydroponics, Soilless or Coco ~ 5.5 – 6.5 pH
For hydroponic growing setups (as well as soilless growing mediums like coco coir) an optimum root zone pH is between 5.5 and 6.5. This is slightly more acidic than the optimal root pH for growing in soil.
It’s a good idea to let the pH cover a range instead of always adjusting to the exact same pH number.
See which nutrients are best absorbed at which pH levels
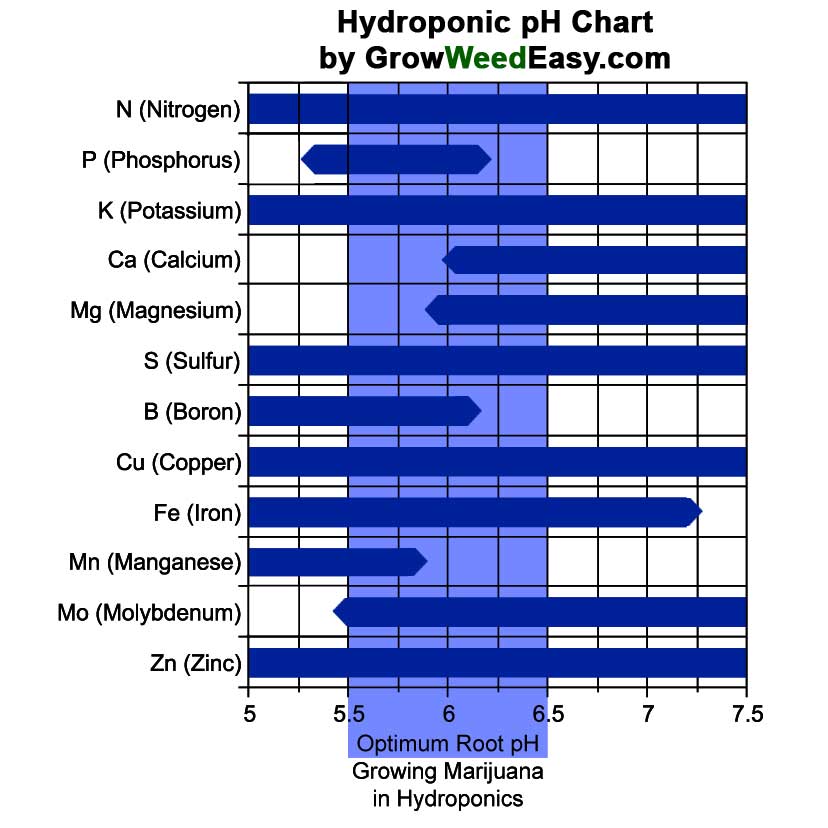
With hydroponics, it’s especially important to allow the pH to range slightly, as you can see above, some nutrients can only be absorbed at higher or lower pH.
In a hydroponic setup, you will almost always be using liquid or powder nutrients, so save yourself a ton of trouble by watching and adjusting the pH as needed! The pH will naturally change over time, and you only need to correct it when it starts going out of the 5.5-6.5 range.
What about soilless mediums like coco coir?
Most soilless growing mediums are completely inert, which means they don’t contribute any nutrients to the plant. Instead, they act more as a support system for your roots while you provide all the nutrients through the water. When the plant is getting all its nutrients in the water, it’s considered a “hydroponic” growing setup.
However, some soilless growing mediums with a lot of organic matter may need a slightly higher pH to thrive. For example, if you heavily amended your growing medium with worm castings (worm poop), you will want to aim for a pH between soil and hydroponic ranges since you’ve added “soil-like” components.
No Need to Be Exact – Let pH Range Up & Down
The thing to remember with pH is that you don’t need to be exact. What you do need is to be consistent in keeping the pH from creeping too high or too low in your plant root zone.
As long as you stick within the recommended pH ranges above, you will prevent the majority of all nutrient problems caused by too-high or too-low pH.
Why is it a good idea to let the pH cover a range instead of always adjusting to the exact same pH number? Some nutrients are better absorbed at slightly higher pH readings, while others are absorbed better at lower pH readings. Not having to try to pinpoint an exact number also saves a lot of unnecessary frustration.
If your marijuana plant roots are experiencing the wrong pH, it’s recommended you react as soon as you notice, and not wait until you actually notice problems with the leaves. It can be tempting to ignore a pH problem, but you’ll often get the best results by acting before your plant displays a problem. That being said, if your plant is growing green, vibrant, and healthy, sometimes the old saying applies, “If it ain’t broke, don’t fix it.”
Tips
Be consistent in making sure pH stays in the range
You don’t need to be exact, just keep an eye on things and react if you notice the pH is getting too high or too low
Add all of your nutrients to your water first before checking and adjusting the pH. Your nutrients will affect the pH of your water so it’s important they get added before making any adjustments.
How to Test and Adjust pH for Cannabis
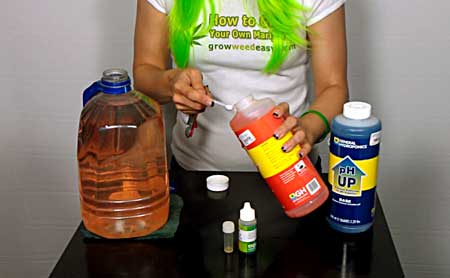
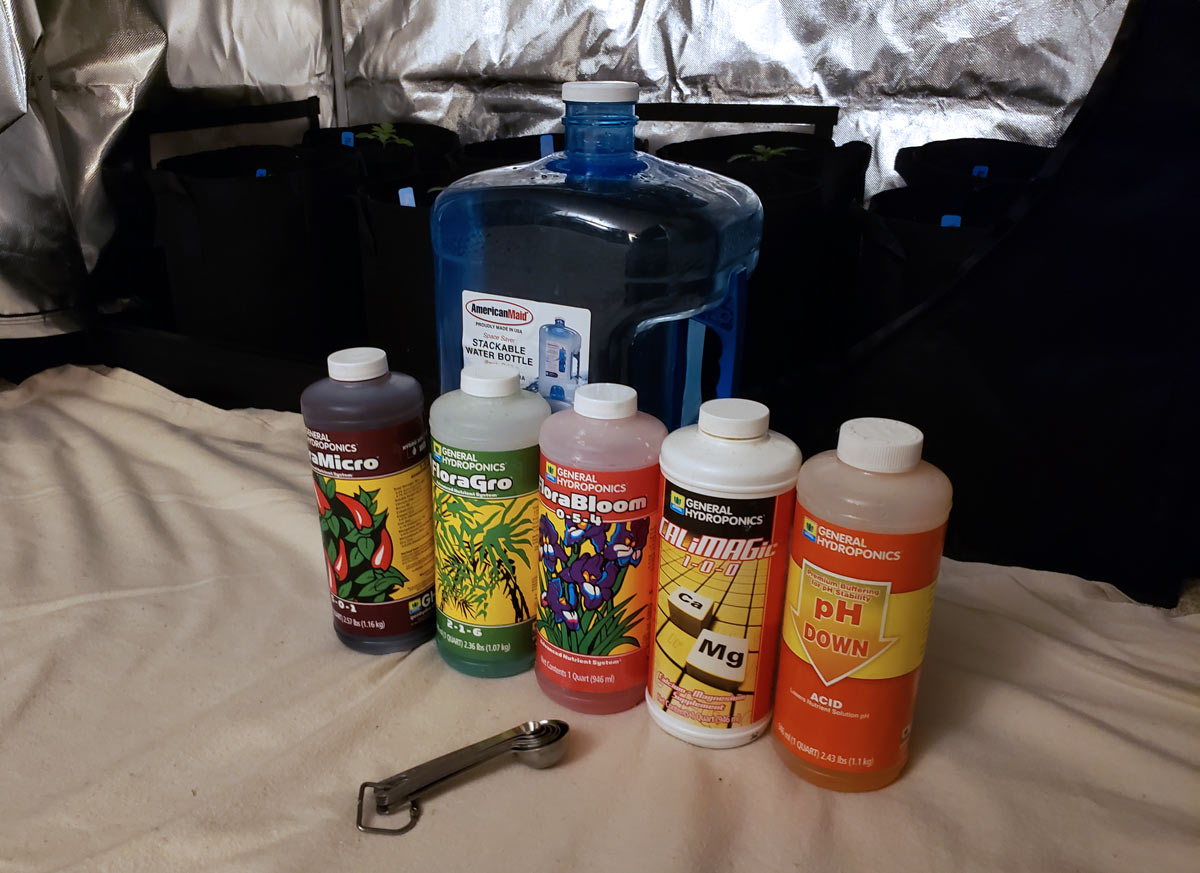
Supplies: What Do I Need to Test & Adjust pH?
‣ PH Tester
Digital pH Pen or
pH Measurement Kit with drops or strips
These are the two most common methods for measuring water pH when growing cannabis. Learn more about the pros and cons between a Digital pH Pen and a pH Measurement Kit.
‣ PH Adjuster
A bottle of “PH Up” and a bottle of “PH Down”
A bottle of PH Up & PH Down gives you one of the best ways to adjust pH in soil or hydro. They each come in a bottle that lets you easily measure how much to add to your water. General Hydroponics makes the most common version of products like this, but there are other brands such as Mad Farmer which make similar products that are just as good.
There are other methods of adjusting pH but using pH Up and pH Down is the best method I’ve tried – I know these products work great for growing cannabis, and they keep the pH more stable than natural alternatives like vinegar or baking soda.
‣ Water
For many growers, tap water works just fine for growing cannabis. Do you need special water?
I use a container that was originally made for drinking water to mix up my nutrients, but many different types of containers will work. Most importantly, avoid anything fragile, especially glass (which can break your instruments or shatter).
‣ Nutrients (If You’re Using Nutrients)
Learn more about cannabis nutrients – do you need them for your setup?
How to Adjust pH For Your Cannabis Plants
Add Any Nutrients or Supplements to Your Water – always do this first because nutrients can change the pH of your water
Gently Shake or Stir Your Water
Test pH – this is done using a pH Pen, drops, or strips. Which one works best?
Adjust pH by adding “PH Up” or “PH Down” solution. Your goal is to get your water in the right pH range for your growing medium. If your pH is too low, you need to add “PH Up,” and if your pH is too high, you need to add “PH Down” in order to correct the pH.
Re-test to make sure pH is in proper range.
Water plants with pH’ed nutrient solution or add water to a hydroponic reservoir
Check – Soil or soilless growers who hand water their plants should check the pH of their runoff water to make sure it’s in the right range – try to test the earliest runoff if possible. Hydroponic growers can check the pH of their water by testing a small sample from their water reservoir a few minutes later. How do I correct a bad pH?
That’s it!
The amount of pH Up or Down you add will vary a lot depending on your water. If you’re using very soft water then you will need just a tiny amount of fluid to adjust the water’s pH since there’s not much “stuff” in the water to buffer the pH. However, if you’re using hard water then you’ll need to add more.
- For PH Down – 1 mL/gallon of water will generally reduce your pH by about 1 point. That’s just a very rough estimate but gives you a starting point. In imperial measurements, that’s 0.2 tsp/gallon (1 tsp/5 gallons) will reduce the pH by 1 point. If you’re regularly measuring PH Down I highly recommend using a blunt-tip syringe with mL measurements, it’s much simpler because imperial measurements don’t have precise enough measurements for the small amounts needed with PH Down!
Note: If you are starting with RO (reverse osmosis) or soft water, you likely need less PH Down than the specified amount; if you have very hard water you may need more! - For PH UP – PH Up is not potent stuff! It actually has a very weak effect. Compared to PH Down you will need to add much more PH Up to adjust the pH by the same amount. With PH Up, depending on how hard your water is you need to add 2-4mL/gallon of water to raise the pH 1 point. In imperial measurements that’s 0.4-0.8tsp/gallon.
- The first time you’re adjusting, you don’t know what pH your water is, how “hard” it is, and how your particular nutrients and supplements are going to affect the pH. Initially, you’ll have to add just a little bit at a time and keep testing until you get an idea of exactly how much you’ll need with your tap water and the nutrients you’re using. After 1-2 times this step will only take seconds!
- It can be helpful to make a note of the total amount of pH up/down added. The total amount of used pH up/down will be about the same each time. Remember that number and write it down! It will make pH’ing easier in the future! The amount will change a little depending on which nutrients your plant is getting for its current stage of life, but having a ballpark figure is really helpful.
Watch our video above to see Nebula give a demonstration!
Unfortunately, there’s no exact formula for adjusting pH, because factors such as the source of water, growing medium, nutrients, drainage, and growing setup all have an effect on pH.
You will need to use trial and error to figure out what amount of pH Up or Down works for you in your setup with your nutrients.
If you’re new to adjusting pH, start small with pH Up and Down, and only work your way up to bigger amounts after you’ve gained some experience. Most growers will be able to figure out their personal measurements within 1-2 waterings.
The very first time you pH your water, it will take a little trial and error to figure out how much PH Up or PH Down to add to get to the right number since everyone’s water is a little different. The general idea is to start with a little bit, maybe a few drops, then retest and add more if needed. Continue this until you get the water in the proper range. PH Down is much stronger than PH Up, so be extra careful with PH Down! After the first time, it will be much easier to measure out how much you need.
Tips for Cannabis Nutrient & pH Management:
Don’t Go Overboard: With liquid nutrients, it’s usually better to give too little than too much. You can always add more, but it’s harder to take nutrients back. A good rule of thumb is to start out at half the recommended dose, and only raise nutrient levels if the plant needs it.
Never Mix Nutrients or Supplements Directly With Each Other: Always add nutrients directly to your water. It’s bad to mix nutrients together. They can react with each other in a way that can make nutrients less available to your plants. Most nutrient bottles or pH adjusters will come with a clear warning that says the same thing. Always add any additives directly to the water – your plants will thank you for it.
Add “Micro” to Water First – If you’re using a 3-part nutrient series with a bottle for “Micro,” you should always add that to the water first. It will also say so on the bottle and on the nutrient schedule, but just something to be aware of.
Tap Water Can Be Easier to pH Than RO or Highly Filtered Water: Tap water or mineral water has an extra buffer of extra minerals and other “stuff” in the water. This helps prevent the pH from swinging up too high or too low quickly and can make pHing easier. RO water has little buffer (it’s basically pure water) and tends to swing up and down in pH easily with just a little pH Up or Down. Do you need special water or is your tap water good enough?
Shaking Water Changes the pH: When checking and adjusting pH, some growers like to shake their water containers to make sure everything is evenly mixed. This works well, and roots love the extra dissolved oxygen, but it’s important to understand that after shaking the nutrient water for a long time, the additional dissolved oxygen will raise the pH of the water. Don’t worry about this – don’t retest then readjust the pH. If you’re going to hand-water to your plant, you want to make sure you go by the pH of the water before it was shaken up. In hydro, the water is going to be oxygenated anyway, so shaking it before testing is ok. If water is allowed to sit for a while, it’s normal for the pH to change a bit. When it comes to mixing, make sure you mix water gently so nutrients and pH Up or Down are evenly distributed, but avoid vigorous shaking until after you’ve already adjusted the pH.
pH Drift is Normal. Try to keep pH in the suggested range and you’ll be fine, even if it’s on the higher or lower end of the scale.
Summary of Steps
- Get Current Root pH
- Adjust pH – Instructions
- Checking & Maintenance
1.) First get a ballpark figure of the current root pH
Soil or Soilless Mediums
Next time you water the growing medium, test the pH of the water going in
Test the pH of the water that runs out of the bottom (runoff water)
If the pH of the runoff is in the right range, even if it’s not the same as the pH you put in, you’re good. If the pH of the runoff water coming out is too high or too low for your range, you know that you’ll need to correct the pH.
Hydroponics
Test the pH of the reservoir by taking a small sample of water and use it to test the pH.
If the pH is outside the 5.5-6.5 pH range, you know you’ll need to correct the pH.
2.) If the pH at Root Zone is Too High or Low, Adjust the pH
Let’s break down exactly what you need to do!
Hydroponics (roots in water)
Tips For hand-watered plants… (soil or soilless)
Think about the pH of the water that you watered your plants with. You made sure it was in the right range. So if the pH that comes out the bottom is outside the range, that means you need to either raise or lower the pH to get it back where it should be.
Flushing – pH problems are sometimes caused by over-fertilizing (the plant was given too many nutrients or supplements, which builds up salts in the growing medium). If you believe this is the case, flush the growing medium to remove salt buildup. This should only be done when the regular method isn’t working for you, and/or you have no other choice. Flushing means giving your plants 1-3 times the volume of their container with plain, pHed water. The flush leaches out extra nutrients and salts. After the flush, water plants with a light nutrient solution. It’s normal for plants to droop when they’ve been flushed (showing signs of being overwatered), but the drooping will go away as soon as the medium begins to dry out. After the top inch of the growing medium has dried out, water the plant as normal and test the runoff water to see if the pH has corrected itself.
Water going in should be 6-7 pH
If runoff pH is…
- 6-7 pH – in the right range, no changes needed.
- Less than 6 – provide next watering at pH 7
- More than 7 – provide next watering at pH 6
Continue this formula with each watering.
Water going in should be 5.5-6.5 pH
If runoff pH is…
- 5.5-6.5 pH – in the right range, no changes needed.
- Less than 5.5 – provide next watering at pH 6.5
- More than 6.5 – provide next watering at pH 5.5
Continue this formula with each watering.
Maintaining pH is especially important in hydroponics. Luckily it’s really straightforward since you only have to worry about the water in your reservoir. However, if the pH is off in between reservoir changes, you can make adjustments.
If pH is too high, add a tiny amount of “PH Down” solution to your reservoir (a little bit goes a long way with PH Down). Return to the reservoir and check pH again in a few minutes.
If pH is too low, add a small amount of “PH Up” solution to your reservoir. Return to the reservoir and check pH again in a few minutes.
Tips for Hydroponics Growers
- The pH of the water tends to go up when the water is oxygenated (for example by adding bubbles or shaking water) – this is normal.
- The pH also changes as plants use up nutrients in the water
- It’s a good idea to completely change your reservoir at least once every 1-2 weeks, especially in the flowering stage when plants are more picky. This constant renewal helps prevent a lot of pH problems as well as nutrient buildup in the reservoir.
- Test reservoir water regularly so you spot any pH problems before they damage your plants
3.)Keep Testing! Learn if you need any more adjustments.
If you’ve recently adjusted the pH of your growing medium or hydroponic setup or made any other major changes, it’s important to keep testing pH regularly!
Digital PH Pen vs Drops or Strips
The most common way to test for the pH of water is probably using drops or strips. These work by taking a water sample, and you compare the color produced to a chart. These give you a rough idea of the pH.
Digital pH pens look a bit like a thermometer. Basically, you dip the end into your water and a digital readout on the screen will tell you the pH.
They each have their pros and cons, so it’s important to figure out which one works better for you.
PH Strips or Drops
Pros
- Cheap
Cons
- Not as exact as a PH Pen
- Some people don’t like using a color chart (learn some tricks)
- It can be hard to read the color in different colored lighting
- Harder to use if you have dark nutrients that stain your water
Digital PH Pen
Pros
- Get an exact reading of the pH on a digital screen – no comparing to charts or other guesswork
- Very quick and easy to test – just dip the pen into the water for a few seconds and the pH will show up on the screen
Cons
- Can be easy to break – always put the cap back on after use!
- Needs to be stored properly – always put a few drops of storage liquid in the cap before putting your pen away or it will stop working
- Needs to be calibrated every grow or so just to make sure it’s staying accurate
- Expensive compared to drops/strips – Requires purchase of not just the PH Pen (which can be pricey) but also 3-4 separate fluids for storage and calibration. That being said, once you’ve purchased everything you’re set for many grows.
This type of pH Test Kit works by using drops or strips that turn a color to reveal the pH of your water, using a color chart. Basically, you take a small sample of water in an included test tube, add a few drops of the pH solution or dip the strip, and then match the resulting color to figure out the pH.
Many pH Control Kits come with pH Up & pH Down included. Even though they’re often sold by “General Hydroponics,” these kits work great for soil in addition to hydroponic applications.
Directions
Find the pH – watch the video
- Take a small water sample in included test tube
- Add a few drops of pH fluid (or dip strip)
- Match the color to find the pH (compare to chart)
Adjust the pH:
- Add a small amount of PH Up to bring it up
- Add a small amount of PH Down to bring it down
- Re-test

How Do Digital pH Testers Work For Growing Cannabis?
Digital pH Pens offer a precise way to measure the pH of your water. No need to squint at a color chart with a pH Pen, you simply look at the number printed out on your screen.
All testers come with step-by-step directions that tell you exactly what you need to do to make sure you pH tester is accurate for years to come.
Don’t get a “TDS” or “PPM” meter by accident! It’s different from a pH pen!
How to Use a PH Pen
- Take off the cap that protects the glass electrode
- Dip the electrode of the PH Pen in the water
- Gently swirl the PH Pen in the water until the number stops changing (may take several seconds or longer)
- Read the pH on the screen. Nice!
- Put the cap back on the pen and store it upright (don’t forget to fill the cap with water or storage solution to prevent the electrode from drying out)
PH Pen Tips
- Re-calibrate the pen once every grow – To ensure your pen stays accurate over time, you will eventually need to get calibration fluids and use them to reset your PH pen. As a bonus, they make it easy to double-check if you ever second-guess your pen’s accuracy.
- Protect the glass electrode – The electrode that does the testing is made of glass and doesn’t like getting dry. So don’t put the cap on dry. You can add some water but I recommend getting a specially made storage solution because it helps keep the pH pen accurate for longer without needing to be re-calibrated.
Examples of PH Pens
Just about any PH pen will be good enough to grow weed, but here are a few examples to give you an idea of what you’re looking for.
PH Tester Digital pH Meter – Cheap!
- You just can’t beat the price! This is one of the cheapest pH pens I’ve seen.
- It may not have all the bells and whistles, but it will get the job done on a budget
Apera pH Tester – this PH Pen costs a bit more it’s the one I use. It stays accurate without needing to be re-calibrated all the time. Some of the cheaper models need to be calibrated more than once per grow because they get inaccurate over time even if you care for them properly.
- Stays accurate without needing to be calibrated often
- Follow the directions, including use and storage – it’s pretty straightforward
- Have a glass jar or heavy mug to store it upright. It’s an upside-down triangle so it’s pretty tippy.

All pH tester pens come with step-by-step directions that tell you exactly what you need to do to get a quick, easy, and accurate reading every time! In order to make sure your pH pen stays accurate, you need to get a few extra bottles.
Calibration, Storage, and Cleaning Solution for pH Pens
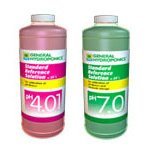
Calibration and Storage Fluid for pH Pens
 Calibration fluid – You get a “4.0” & “7.0” bottle together as a kit, and you need both of them to be able to calibrate your pH pen
- Storage Solution – Not 100% necessary, but it dramatically extends the life of the pen. You put a little bit of this liquid in the cap before you put your pH pen away each time. The storage solution can also be used as a cleaning solution in a pinch, so if you’re just going to get one, get storage solution over cleaning solution.
- Cleaning Solution – Not really necessary, but it extends the life of the pen to clean it if it’s got buildup on it. However, you can also clean the electrode with a storage solution.
If you don’t get all these extra items, you won’t be able to take the best care of your digital pH tester and it won’t give you accurate pH readings and they won’t last nearly as long.
There are many other digital pH testers besides the ones listed above, and many of them will work great. Just be sure you don’t actually buy a “TDS” or “PPM” meter by accident, which is different and does not actually test pH. If you want a TDS meter, that’s great, but many growers accidentally buy one and don’t realize what it’s actually for. Learn more about TDS & PPM.
What to Do After You Test the pH
After using your pH pen, you use a bottle of PH Up & PH Down to adjust the pH to where it should be, if needed.
How to Adjust the pH
- Add a small amount of PH Up to bring it up
- Add a small amount of PH Down to bring it down
- Re-test
Common pH Problems & Questions
Common pH Problems
- I Can’t Tell the Color When Using a Liquid pH Test Kit
- My pH Pen Isn’t Working
- My pH Keep Changing While I’m Testing
- My Runoff Water is Too High / Too Low
Common Questions About pH
- My Plants Look Great, Should I Still Test for pH?
- Why Should I Adjust pH Before Adding Nutrients?
- How Do I Adjust the pH of Outdoor Soil?
- How Do I Learn About My Local Water?
- Can I Get Out of Managing pH?
I’m using pH drops and I can’t tell which color it’s turning.
Try adding more drops of indicator fluid, as well as using fewer drops. When there’s not enough, or too much of the indicator fluid in your vial, it makes it really hard to tell what color the water is turning.
Take a look at the pH pen itself. Is the electrode broken? It looks like a glass bulb on the end of the pen.
Next, was it stored properly? What that means is, was it stored with storage fluid in the cap? If it was stored dry, it can break the pen even if everything looks okay.
Ok, you’re pretty sure the pen itself is okay, so the next question is whether it’s been calibrated properly. Have you recently calibrated it with the 4.0 and 7.0 calibration fluids? An uncalibrated pH pen can give you a wildly inaccurate reading.
Lastly, is the battery ok? These batteries last a really long time but it’s still something to check.
My pH keeps changing when I’m testing
Something to keep in mind is shaking your water actually temporarily raises the pH. So if you keep shaking the water and testing again, you’re going to notice that the pH reading is different.
If you’re using pH fluid or strips, make sure you’re following the directions closely. Adding too much or too little fluid will make it impossible to track the pH.
If you’re using a pH pen, make sure the pH tester is working by testing it on 4.0 and 7.0 calibration fluid.
My runoff pH is too high/low, what do I do?
If the pH is really far off, or if the plant is suffering from toxicity or severe nutrient burn, it may be a good idea to flush the growing medium first. What that means is that you give the plant enough water to get lots of runoff. This helps “flush” out any extra nutrients or salt buildup in the soil. Only flush if you absolutely need to, though! Flushing can temporarily slow down the growth of your plant, so it should only be used in an emergency.
If the runoff is only off by a little bit, you can correct the pH by changing the amount of pH Down or pH Up you provide the plant when watering.
Everything is fine, should I worry about pH?
PH is certainly something to be aware of in order to prevent the plant from showing nutrient deficiencies, but honestly “if it ain’t broke don’t fix it!” If your plant is growing fast and all the leaves look green and healthy, there’s really no reason to change anything. That being said, if you start noticing nutrient deficiencies in your leaves, the very first thing to check is the root pH.
Do I pH the water before or after adding nutrients?
Add nutrients first, then pH the water.
You should test the pH after you add nutrients to the water (if adding nutrients). The nutrients will often change the pH of the water, and you’re concerned with making sure the pH of the water is right, as experienced by the roots.
If not using any nutrients for this feeding, simply adjust the pH of the plain water.
How Easy Is it to Use Liquid Nutrients and Maintain pH?
Liquid nutrients for plants are simple to use (usually consisting of 1-3 bottles for all stages of life) and don’t take up much space. These nutrient systems can be used to provide exactly the right nutrients for your cannabis plant at each stage of life.
Learn about nutrients & get customized nutrient schedules for growing cannabis
Many growers use liquid nutrients made for soil to supplement their soil grow. There are also nutrients that are made to be used in hydroponic setups to provide all the nutrients the plant needs throughout its life, even without soil.
Whether made for soil or hydroponics, all liquid nutrients are used in a similar way.
The Hydroponics vs Soil debate continues to rage on, but no matter what your choice, the nutrients available today have exactly what’s needed by a cannabis plant to thrive at all stages of life, coasting perfectly to harvest time.
For soil growers, being aware of pH is important, especially for those using liquid nutrients. For soilless and hydroponic growers, liquid nutrients and pH management are required tools that give growers a greater ability to affect plant growth – for better or worse.
Note: Some soil growers will add a handful of dolomite lime as they’re mixing their soil. Dolomite lime can help buffer pH and keep it from getting too low, while also adding a source of calcium and magnesium. But lime should be added before you start your grow so it has enough time to break down, so this method is not recommended unless you’re mixing up your own soil. Learn how to mix up your own soil for growing cannabis.
No way, maintaining pH for your cannabis grow can be easy and intuitive!
Learn all about how to check and adjust your pH for cannabis
Measuring and adjusting the pH is as simple a process as mixing up the nutrients themselves. The pHing process can take less than a minute, and the results you’ll get in better growth and bigger colas are worth the few minutes it takes to pH.
Basically, you take a small sample of your water and test it to find out the pH.
You can use a pH Control kit or a digital pH tester. The pH control kit has you add a few drops of a special solution to your small water sample and match the resulting color to find the pH. A digital pH tester can be stuck directly in the water to get the pH printed on a small screen but requires regular calibration and proper storage with storage solution to stay accurate.
Whether you’re using a pH control kit or a digital tester, basically you use your water sample to learn the pH. You have “pH Up” or “pH Down” solution to adjust if it’s too high or too low.
How to bring pH up or down outdoors
Great for the outdoors, these options for adjusting pH are not recommended for indoor growers unless you know what you’re doing 🙂
Note: There are other methods of natural pH management besides the ones that follow, but these are the ones we know will definitely work. They are intended for growers who are growing on larger patches of land and need to change the pH of a lot of soil.
Bring Up pH
Lime is one of the most proven ways to bring up the pH of soil outdoors.
- Use agricultural or garden lime in soil to bring up pH (the smaller the particles of lime, the sooner they will become available). This type of lime (agricultural or garden lime) adds plenty of Calcium, too, but not a lot of Magnesium.
- Dolomite lime will add plenty of Magnesium in addition to Calcium. Many cannabis growers like to add a handful of dolomite to their soil when mixing it up to buffer the pH and provide a steady source of calcium and magnesium.
Mix lime thoroughly with the soil, and keep it relatively moist to “activate” the lime. The finer the limestone source, the quicker it will be absorbed – powdered lime works much more quickly than larger sources of lime, which take time to break down.
Liming to bring up pH and enrich with Calcium/Magnesium should be used at the beginning of the grow before plants are placed in the soil. Cannabis likes slightly acidic soil, so it’s important not to go overboard and bring the pH too high (soil for cannabis should be pH 6.0-7.0, so pH 7.0 and above is too high).
Don’t use lime unless you follow the directions closely, you don’t want to cause a bigger problem than the one you’re trying to fix.
Adding lime in the middle of a grow can cause or mask a bigger problem with the nutrients and salt buildups in the soil. You’ll get the best results if you add the lime to moist soil 2-3 months before growing, so the lime has time to break down in the soil and adjust the soil pH.
However, some cannabis growers do add lime to their flowering cannabis plants grown in soil to help buffer the pH and keep the pH from dropping. When adding lime in the middle of a grow (after you’ve established that there’s too-low ph in the soil) do not add more than 1 teaspoon (5 ml) per gallon of soil.
Bring Down pH
There are a few common ways to bring down the pH of soil:
- Aluminum sulfate – works more quickly
- Elemental sulfur – tends to take longer
Alkaline soil needs to have the pH lowered to grow cannabis. Cannabis needs a soil pH of 6.0-7.0, and alkaline soil has a pH above 7.
Just like lime, using aluminum sulfate or elemental sulfur to bring down pH can be tough to get just right. Don’t use lime unless you follow the directions closely, you don’t want to cause a bigger problem than the one you’re trying to fix.
While aluminum sulfate is effective at lowering the pH in a relatively short amount of time, elemental sulfur should only be used at the beginning of the grow. You’ll get the best results if you add the elemental sulfur to moist soil 2-3 months before growing, so the sulfur has time to break down in the soil and adjust the pH. Depending on where you live, Sulfur (or “Sulphur”) is also known as “soil sulfur,” “powdered sulfur” or “flowers of sulfur.”
How Do I Learn More About My Local Water?
Check with your water company to learn more about your tap water. They will be able to provide you with lots of important info.
You can also do some testing on your own such as…
pH (discussed in this article)
Special Water Won’t Help Your Grow Unless You Need It!
Many growers don’t need special water. Some growers think that special water will somehow give them better results when it comes to cannabis growth and harvest. The truth is, special water is not going to help you grow unless you actually need it.
What options do you have if your water is not good for growing cannabis?
RO (Reverse Osmosis Water) – RO gives you nearly pure H2O. Everything has been taken out of the water, including minerals. With RO, you have a blank slate to start with, so you have 100% control over the water in your cannabis garden. However, with RO water, there’s less of a buffer to help prevent pH fluctuations. PH tends to swing up and down more easily in RO water. RO also tends to be associated with calcium and magnesium deficiencies (since these minerals are normally found in water), so adding a Cal-Mag supplement is usually beneficial for RO growers.
Filtered or Store-bought drinking water (treat similarly to tap water)
Rain water (treat similarly to tap water – some rainwater isn’t good)
How Can I Get Out of Managing pH?
Growers who rely on using properly amended and/or composted soil are the least likely to be hit by nutrient deficiencies caused by pH problems. The more organic matter in the soil, generally the less the soil pH matters as far as nutrient absorption. The natural process of soil breaking down helps make nutrients more available to the roots. But cannabis needs very specific nutrient requirements to get the best results.
Growing in Soil? You may not need to worry about pH
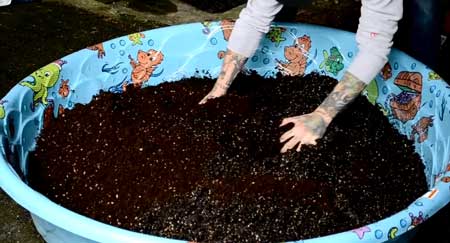
If you want to grow cannabis without worrying about pH, you’ll likely want to grow using amended, composted soil. Read about composting your own soil for growing cannabis. However when it comes to composting soil, it generally takes a bit of time, space and mixing before your soil is ready to use.
No Time to Compost Your Own Soil? Liquid Nutrients are Easy, Cheap & Effective
A lot of growers don’t have the time or space to mix up their own soil, which may involve amending, understanding how micro-organisms in the soil affect nutrient absorption, maintaining a compost pile, etc. Because growing in soil can involve a lot of prep work (or for those who live in a city where there’s not enough room for an organic, composted soil grow), there are hundreds of liquid nutrients which can be much more convenient for cannabis gardeners.
Liquid nutrients provide plants with everything they need at all stages of life. By following a simple nutrient schedule, growers are able to use the perfect amount of nutrients at the right time to power the growth of the plant, leaves, and buds.
Whether you’re growing in soil or hydroponics, you can use cannabis nutrients to make sure your plants have all nutrients needed, without having to mix up any soil yourself. Just follow the basic instructions for the nutrients, and your cannabis will thrive.
For many growers, liquid nutrients make growing cannabis more simple, straightforward and satisfying.
Learn About Liquid Nutrients for Cannabis:
https://www.growweedeasy.com/cannabis-nutrients
Who Should pH? Everyone who uses non-pure water and/or nutrients
Unless your water source happens to be well-suited to growing cannabis (it naturally contains some minerals and a pH around 6.9 or a little less; for example, good spring water). Paying attention to pH is pretty much required for any cannabis growers using nutrients. Even soil growers who don’t give nutrients should pay attention, though soil growers tend to get more of a buffer against pH-caused nutrient deficiencies due to all the organic matter (especially cannabis growers who start with great composted soil).
Unless you’re willing to learn about soil for cannabis and mix up your own soil, there’s often no way you can get out of pH management – if you refuse to manage pH, your only option is to just try it your way to see what happens. Some growers get lucky winging it, and if you’ve successfully grown a plant like tomatoes or corn, you’ll probably be able to provide for your plants using what you already know.
But if you’re just thinking about buying standard potting soil from the local garden store, or using the soil you found around your house, you’re probably going to need liquid nutrients to supplement your cannabis grow for the best results and yields. Maintaining pH is one of the best tools you have to get the most from your nutrients.
Summary: What You Need to Remember About pH & Growing Cannabis
1.) Always test the pH of the water you give your plants (it takes under 5 minutes).
- Testing – you can use a digital pens or a pH Test Kit
- Get a bottle of pH Up & pH Down – these magical bottles of fluid give you a way to adjust the pH up or down quickly and with precision
2.) Add all your nutrients and supplements before testing/adjusting pH. Many nutrients/supplements can change the pH of your water. Make sure to add everything to your water before you attempt to test or adjust the pH.
3.) If you are using nutrients and still seeing nutrient deficiencies, the first thing to do is check the pH of the water going in, and the runoff water coming out. This is because the wrong pH can prevent plant roots from absorbing nutrients effectively
4.) You may need to correct the pH by giving water at the opposite of the ideal range next time you water your plants.
5.) It’s okay/good if the pH isn’t perfect as long as it stays in the right range, but aim for the middle of each range. Soil pH should be between 6.0 – 7.0. Hydroponics pH should be between 5.5 – 6.5
Jump to…
7 Steps to Fix 99% of Growing Problems
Train Your Plants for Bigger Yields